
Step 1 – Find your pond location
Top tips for choosing your spot
- Ideally, choose a low point in your garden where rain water will naturally collect.
- Choose a spot that is naturally shady, next to a wall, fence or tree to minimise evaporation and allow animals to shelter from sunlight on hot summer days. However, remember sunlight causes life to flourish by growing the lowest level of the your food chain (algae), so don’t make it too shady! Ideally you want your pond to get the morning sun, but avoid the heat of the day.
- Keep your pond a good distance away from large trees as leaves and roots can invade a small pond.
- Wildlife won’t visit if they feel exposed to predators (like the neighbourhood cat). Place the pond near a “wildlife corridor”—tall grass, a hedge, or a shrubbery. This allows frogs, newts, and hedgehogs to approach the water under cover. If you place your pond in the middle of the lawn, animals won’t risk being exposes to predators.
Step 2 – Start Digging
Top tips for digging your pond hole
- Ensure your pond is 60cm deep in the middle, this will stop the whole pond freezing in winter to protect any hibernating animals.
- Make sure your pond doesn’t have a sheer drop. Make a beach or gradual slope to allow animals to enter and exit the pond in a safe way. Birds need a shallow area to bathe, and dragonflies need “shelf” plants to transition from larvae to flight.
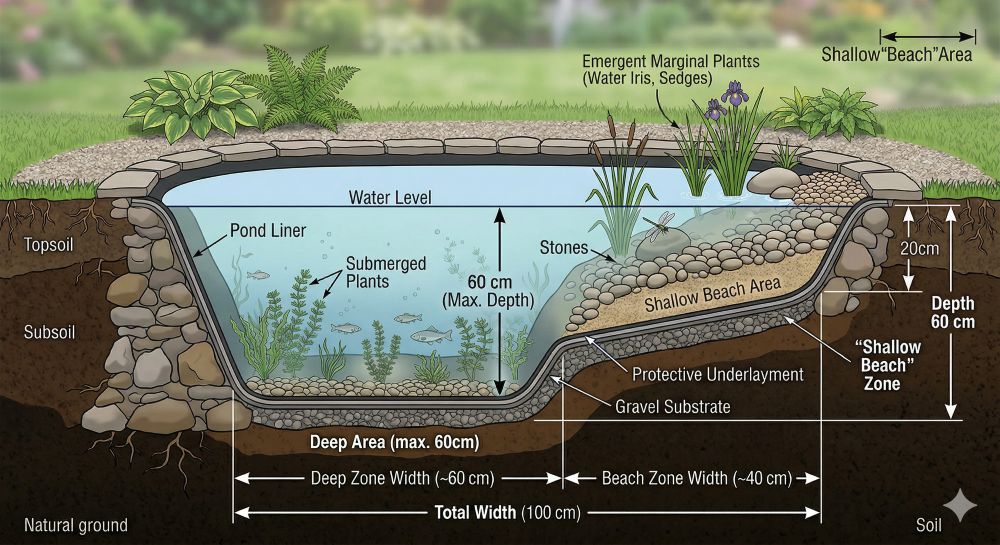
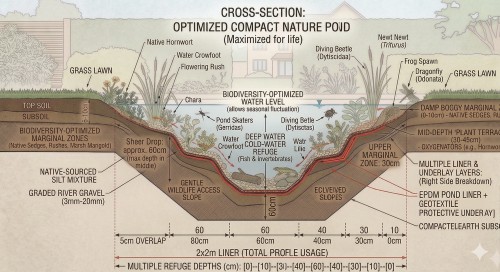
A pond of this size must be built to have levels and stages down to a total depth of at least 60cm. It comes in 4 main stages: Beach, Marginal, Mid Depths, Deep Zone…each stage must be reached at your dig to 60cm deep.
Step 3 – Put in your liner
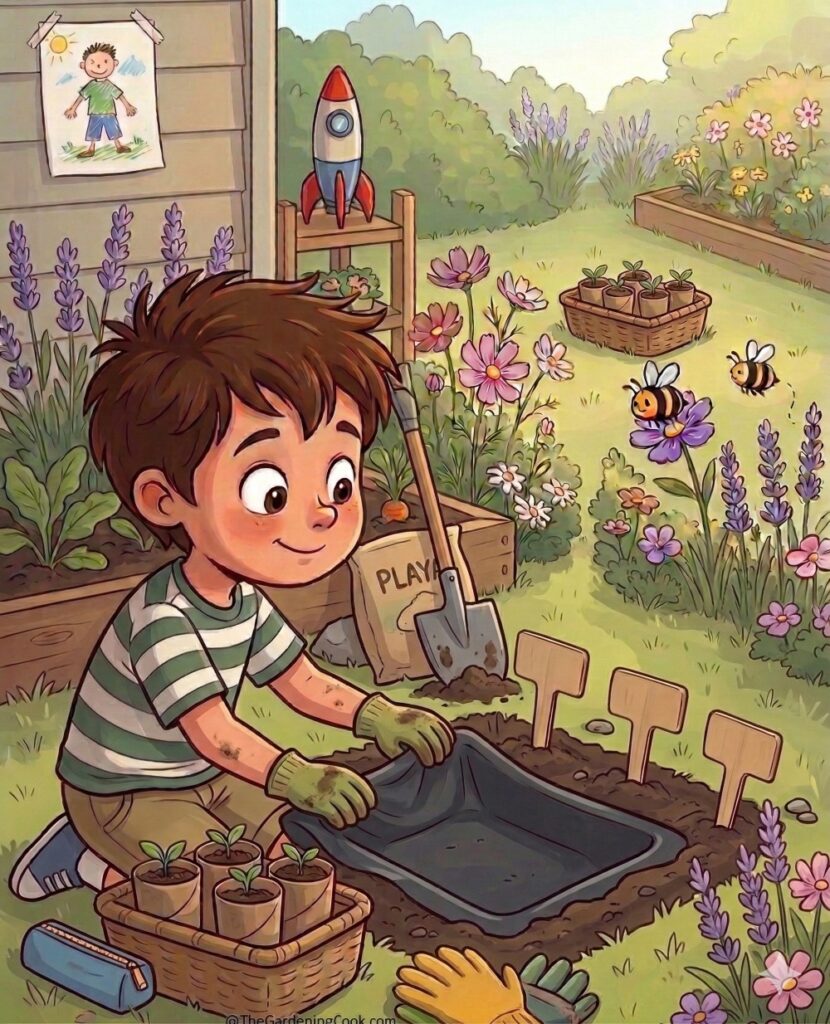
How to lay your pond liner
- Place your liner in your hole, ensure it’s completely stretched with no wrinkles.
- Place some rocks around the outside to keep it weighed down whilst you fill it with water.
Step 4 – Fill with water
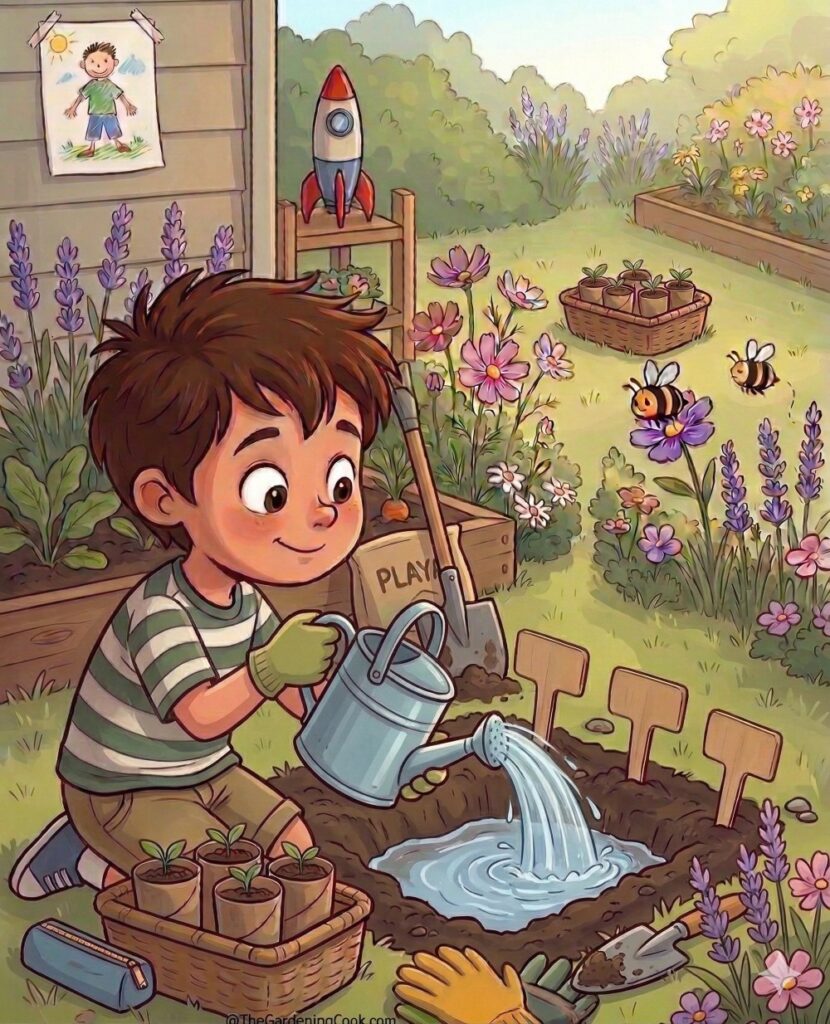
Tips for filling your pond
- Use old rain water if you have this available. An old bucket or water butt would be ideal. If you are going to use your tap or hose, leave the water outside for a couple of days to allow for chemicals to evaporate. Tap water is treated with chlorine/chloramine (to kill bacteria) and often contains high levels of nitrates and phosphates. While safe for us, these nutrients act like “rocket fuel” for algae. In a small 1x1m pond, tap water almost always leads to a “pea soup” green bloom or thick blanket weed. Rainwater is nutrient-poor, which actually encourages a more diverse range of delicate aquatic plants and keeps the water crystal clear.
- If you need to use a hose: Don’t blast the hose directly at the bottom. It will stir up sediment, displace your carefully placed rocks, and cloud the water for weeks. Place a large dinner plate or a plastic bag on the floor of the pond. Aim the hose at the plate so the water spills over the edges gently. This keeps your landscaping intact and your water clear from day one.
- Resist the urge to add “bucket water” from a local pond. While well-meaning, this often introduces invasive weeds or diseases. Local wildlife (like frogs and boatmen) will find your pond via scent and sight within days—sometimes even hours!
Step 5 – Decorate and Build Up
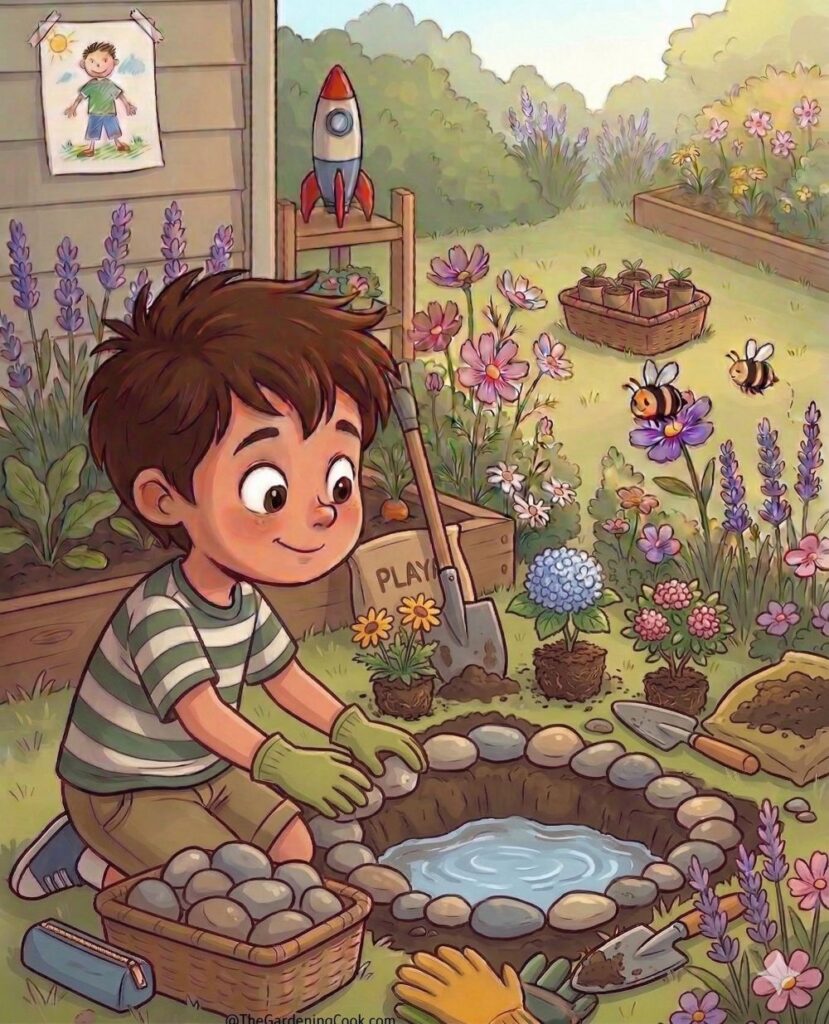
Tips for decorating your pond
- Think about the “transition zone.” The area immediately surrounding your pond (the “marginal” and “bog” zones) acts as a landing strip for dragonflies, a nursery for baby frogs (froglets), and a buffet for pollinators.
- Emergent plants – stand tall out of the water and act as a ladder for emerging larvae who grow up in the pond. Lesser Spearwort (Ranunculus flammula), Brooklime (Veronica beccabunga), Hard Rush (Juncus inflexus).
- The Pollinator Magnets – Plant these in the damp soil right at the edge of the pond. Marsh Marigold (Caltha palustris), Water Forget-Me-Not (Myosotis scorpioides), Cuckooflower (Cardamine pratensis).
- The “Protection” Layer – Wildlife needs a way to get to the pond safely. If the area around your 1x1m pond is just bare soil or short grass, many creatures won’t risk the trip. Creeping Jenny (Lysimachia nummularia), Purple Loosestrife (Lythrum salicaria), Native Grasses (e.g., Red Fescue).
- For a 1x1m pond, less is more. A common mistake is overplanting, which leads to the pond disappearing under a green carpet within one season.
- When planting around the edge, ensure at least one plant has leaves that trail into the water. This acts as a natural ladder for any creature that accidentally falls in or for young frogs trying to leave the water for the first time.
- Create a place for animals to hide such as a pile of sticks, upside down plant pots, a pile of logs, bricks, rocks, get creative! This will allow prey to hide from predators and attract even more species to your pond such as spiders, woodlice, mice, ants etc.